Whether in the bathroom, kitchen or living area - tiles are not only functional, but also aesthetically pleasing. But despite all the enthusiasm, there are some stumbling blocks lurking that can cause difficulties even for experienced do-it-yourselfers. Let's dive into the most common mistakes made when installing tile and learn how to elegantly avoid these pitfalls. Together, let's make sure your next tile project is a complete success!
The five most common mistakes made when laying tiles:
- Insufficient preparation: Often not enough time is spent on preparing the substrate. Make sure the surface is level, clean and dry before you start tiling. Thoroughly remove old tile debris, dust and dirt.
- Wrong tile adhesive selection: Choosing the wrong tile adhesive can lead to adhesion problems. Be sure to choose the right type of adhesive for your tiles and substrate. Porous tiles or damp areas may require special adhesives.
- Inadequate grouting: Improper grouting can lead to moisture problems. Make sure grout is applied evenly and completely. Use waterproof grout in wet areas.
- Poor alignment and planning: tiles that are not properly aligned can affect the overall appearance. Take time to take accurate measurements and plan. Use guide lines and markings to ensure tiles are straight and arranged in patterns.
- Lack of tile cutting skills: Cutting tile requires proper technique and tools. Improperly cut tiles can negatively affect the overall appearance. Practice using a tile cutter to achieve precise cuts.
Would you like a little more detail? No problem. We'll go into more detail on every point!
Insufficient preparation: the basis for a successful tile backsplash
In the rush to start a project, many overlook the critical importance of proper preparation of the substrate. It's understandable that the anticipation of tiling creates the temptation to get started right away. But the quality and longevity of the end result depends largely on the care taken in preparing the substrate. Here are some basic steps you should consider:
 Prepare substrate
- Levelness of the subfloor: An uneven subfloor inevitably leads to irregular tiles, which not only look unsightly, but can also affect durability. Use a level and a straightedge to ensure that the substrate is absolutely flat. If there are any irregularities, it may be necessary to apply a leveling compound to create a smooth surface.
- Cleanliness is critical: dust, dirt and other debris can affect the adhesion of the tile adhesive. Before installing tile, it is essential to thoroughly clean the substrate. Use a brush, vacuum, or even a damp rag to ensure the surface is free of any debris.
- Dryness of the substrate: tile adhesive needs a dry surface to adhere properly. A damp substrate can lead to problems such as mold growth or tile peeling. Measure the moisture of the subfloor before starting the project to make sure it is dry enough.
- Remove old tile residue: If you are working on a previously tiled subfloor, it is important to carefully remove old tile residue. This residue can make the surface uneven and affect the adhesion of the new tiles.
- Make repairs: Especially in older rooms, there could be cracks or damage in the subfloor. These should be repaired before tiling to ensure an even base. Our decoupling mat CI++ can be laid quickly and easily and protects against cracking.
By investing sufficient time and care in preparing the substrate, you lay the foundation for a successful tile project. Remember that the effort you put in at the beginning will pay off in an aesthetically pleasing and long-lasting tile backsplash.
Wrong tile adhesive choice: The importance of making the right choice for a successful tile project
Choosing the right tile adhesive is crucial, as it directly affects the adhesion, durability and stability of your tiles. A common mistake is underestimating this decision, which can lead to serious problems. Here are some important aspects to consider when choosing tile adhesive:
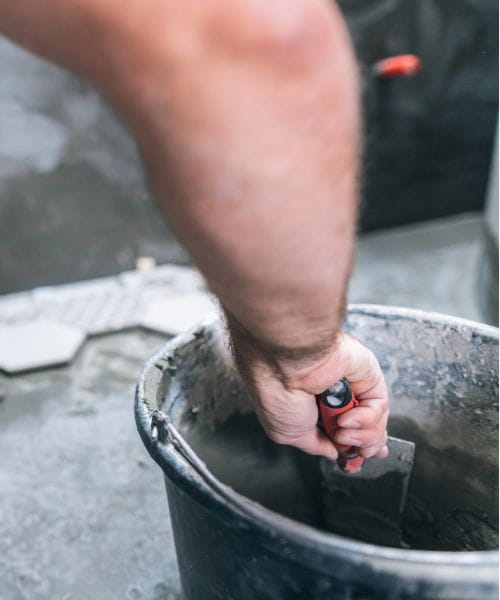 Apply tile adhesive
- Type of tile adhesive: There are different types of tile adhesives that have different properties depending on the type of tile and substrate. Flexible tile adhesive is good for areas subject to vibration or temperature changes. Be sure to choose the adhesive that best fits the specific needs of your project.
- Tile material: porcelain, ceramic, natural stone and glass tiles have different properties. Choose a tile adhesive that is suitable for the material of your tiles. Some adhesives are specially formulated to better adhere porous tile materials, while others are suitable for more delicate surfaces like glass.
- Substrate Consideration: The subfloor on which you install tile is just as important as the tile itself. An uneven or damp substrate requires a tile adhesive with special adhesion properties. Always use the type of adhesive that is best suited for the substrate at hand.
- Thin-layer adhesive and tile adhesive consistency: another common mistake is mixing the tile adhesive too thin. Often this is done for convenience, as it seems easier to apply thin adhesive. However, thinly mixed adhesive can result in insufficient adhesion, which could cause the tiles to slip later. Be sure to follow the manufacturer's recommended mixing ratio exactly to achieve the right consistency. We recommend using our spiral mixer for mixing.
- Better adhesion with sufficient thickness: remember that a sufficiently thick tile adhesive not only provides better adhesion, but can also compensate for unevenness in the substrate. This is particularly important to achieve a smooth end result.
Choosing the right tile adhesive may seem complex at first glance, but it is fundamental to the success of your tile project. Invest time in research and, if unsure, consult the manufacturer or professionals to ensure you are using the ideal tile adhesive for your specific needs. By doing so, you will lay the foundation for an impressive tile result that is not only beautiful to look at, but will also last.
Lack of tile cutting skills: The art of precise tile cutting
Cutting tiles may seem like a simple task at first glance, but it requires both the right technique and the right tools to achieve flawless results. Often, the importance of this skill is underestimated, which can lead to messy cuts and a compromised overall appearance. Here are some useful considerations for mastering the art of tile cutting:
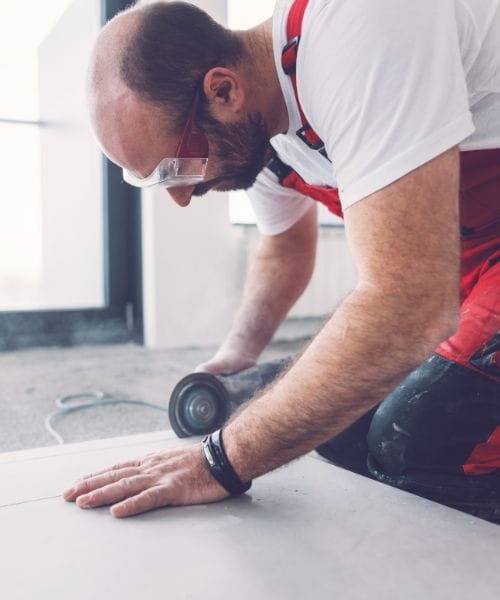 Cutting tiles
- Choosing the right tool: A high-quality tile cutter is essential to achieve precise cuts. There are several types of tile cutters, including manual tile cutters and electric tile cutters. Choose the tool that best suits your project and comfort level.
- Practice makes perfect: using a tile cutter requires practice. Before you venture into your main project, practice cutting on a few test tiles. This will help you develop a feel for the pressure, angle and speed needed to make accurate cuts.
- Mark your cuts: use a water-soluble pen (tile & glass marker red) or tape to mark the cut line on the tile. Accurate marking is the key to a precise cut.
- Cut slowly and evenly: Patience is key when cutting. Don't press too hard on the tile cutter; let the tool do the work. Make the cut slowly and evenly to get clean and straight edges.
- Support for large tiles: For larger tiles, it can be difficult to get a precise cut with a manual tile cutter. In such cases, electric tile cutters may be a better option as they are able to make consistent and accurate cuts on larger tiles.
- Don't forget safety: Always wear safety glasses and gloves when working with tile cutters to avoid injury.
The ability to cut tiles accurately is invaluable in achieving a professional and aesthetically pleasing end result. Take the time to learn the technique of cutting tiles and practice until you feel confident. With patience and practice, you will be able to cut tiles in a wide variety of shapes and sizes, taking your tile project to the next level.
Poor alignment and planning: the importance of precision and pre-planning when laying tiles
Proper alignment and planning during tile installation are essential to achieving an aesthetically pleasing and professional result. After all, tile is not only functional, but also contributes significantly to the visual aesthetics of a room. Here are some crucial considerations to ensure your tiles are straight, aligned and arranged in harmonious patterns:
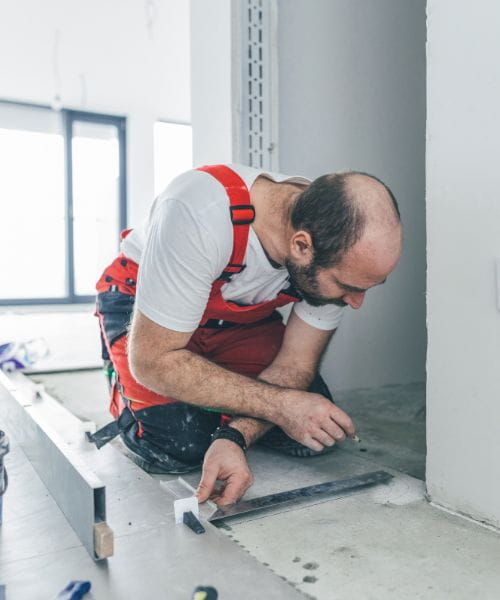 Tile alignment
- Accuracy in measurements and planning: Start with a precise measurement of the area to be installed. Pay attention to features such as corners, edges, and areas around switches and outlets. Take time to plan and mark to ensure your tiles are symmetrical and balanced.
- Guide lines and markings: Guide lines are an essential tool to make sure your tiles are perfectly aligned. Use a long spirit level or straightedge to mark straight lines as a guide. These lines will help you accurately position the first row of tiles, which in turn will set the tone for the entire installation.
- Note pattern alignment: If you want to create a specific pattern or design with your tiles, proper alignment is even more important. Start laying in the center of the room and work from there to ensure the pattern is evenly distributed in all directions.
- Consider Spacing: In addition to alignment, the space between tiles is also important. Use tile spacers (such as grout crosses white X-shape) to ensure even joints. Make sure the grout width is the same in all areas to achieve a cohesive overall look.
- Continuous checking: check your work regularly as you go along. Correcting minor discrepancies is easier if they are caught early. Continuous checking ensures that your project stays on track.
The effort you put into alignment and planning will pay off in the end. A meticulously aligned backsplash gives a room a professional and appealing feel. Plan ahead, use guide lines, and continually monitor alignment to ensure your tile work produces an impressive result that reflects the precision and care you put into it.
Inadequate grouting: The importance of correct grouting for tile projects
Grouting is the final key step in tile installation and plays a critical role in the durability and appearance of your tile backsplash. Incomplete or improper grouting can not only affect the aesthetic outcome, but can also lead to moisture problems. Here are some important aspects to consider:
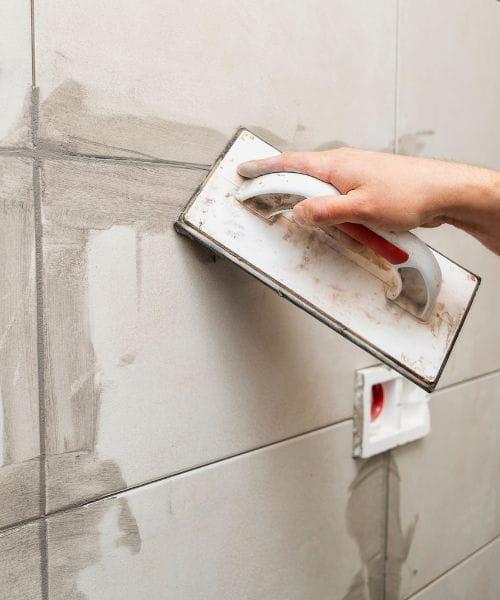 Grouting tiles
- Uniform application: The grout is responsible not only for filling the space between the tiles, but also for the stability and protective function of the overall result. Make sure that the grout is applied evenly and completely, e.g. with the grout trowel with wooden handle. Avoid excessive application, as excess grout can detract from the overall appearance.
- Choosing the right grout: Not all grouts are the same. Use the right type of grout depending on the application. In wet areas such as bathrooms and kitchens, it is especially important to use waterproof grout to prevent moisture penetration.
- Thorough cleaning: After you apply the grout, clean the tiles thoroughly to remove excess grout before it hardens. Use a sponge or grout rubber to do this, and rinse regularly to achieve a clean finish. We recommend our roller wash kit here.
- Observe curing time: Allow the grout to cure for a sufficient amount of time before reloading or cleaning the area. The exact curing time will depend on the grout selected and should be recommended by the manufacturer.
- Regular maintenance: although correctly grouted tiles are highly durable, it is still advisable to check the grout regularly and re-grout or re-seal as necessary. This is especially important in areas of high moisture or heavy wear.
Grouting is not only an aesthetic element, but also an important protective mechanism that prevents moisture from entering the space between the tiles. Make sure you apply it evenly, choose the right grout, and make sure it is cleaned and cured properly. By following these steps, you will contribute to the longevity and aesthetics of your tile backsplash while minimizing potential moisture problems.


